

How to Organize Jeep Overland Gear with Smart Exterior Storage Solutions
Jeep overlanding is rarely limited by where the vehicle can go. More often, the real limitation is how well the gear is organized. Recovery tools, camping equipment, fuel, water, lighting accessories, cooking gear, and personal luggage can quickly turn a clean Jeep build into a crowded cargo area. Once the rear cabin becomes overloaded, every stop on the trail becomes slower and every piece of equipment becomes harder to access.
That is why exterior storage matters. A smart Jeep exterior storage setup does not simply add more parts to the vehicle. It creates a better layout. Roof racks handle bulky cargo. Rear window storage panels keep frequently used tools outside the cabin. Jerrycan kits help separate fuel or water storage from soft bags and interior equipment. When these accessories work together, a Jeep becomes easier to pack, easier to use, and more practical for long-distance trail travel.
This guide explains how to organize Jeep overland gear with smart exterior storage solutions, including roof rack planning, side-mounted storage, Jerrycan placement, trail gear access, and how to build a balanced layout for camping, recovery, and adventure driving.
Why Storage Becomes the Biggest Challenge in Jeep Overlanding
A Jeep Wrangler or Gladiator gives owners excellent trail capability, but interior cargo space is still limited. Once a trip moves beyond a short day drive, the packing list grows quickly. A basic overland trip may include recovery straps, air tools, tool rolls, water, fuel, sleeping gear, cooking equipment, spare clothing, lighting gear, a compressor, and emergency supplies.
If everything is placed inside the cargo area, the space becomes crowded. Heavy tools may sit next to soft camping bags. Fuel or water containers may reduce usable cabin space. Items needed first may end up buried under luggage. This is inconvenient on pavement and even worse on the trail, where the vehicle may be parked on uneven ground, in rain, in dust, or after dark.
Exterior storage helps solve this by assigning each type of gear to a better location. The goal is not to move everything outside. The goal is to decide what should stay protected inside and what should be mounted outside for faster access and better space management.
Interior Storage vs Exterior Storage: What Belongs Where?
A good Jeep storage system starts with separation. Interior space should be reserved for items that need protection from weather, dust, theft, or impact. Exterior storage should be used for gear that is bulky, dirty, frequently accessed, or easier to handle outside the cabin.
| Storage Method | Best For | Limitation |
|---|---|---|
| Interior cargo area | Clothing, electronics, food, soft bags | Limited space and harder access when packed |
| Roof rack | Large cargo, storage boxes, camping equipment | Adds height and needs careful load planning |
| Rear window storage panel | Tools, MOLLE bags, trail accessories | Needs secure mounting and balanced loading |
| Jerrycan kit | Fuel or water support for longer trips | Should be mounted securely and used responsibly |
Once this logic is clear, storage upgrades become easier to choose. Instead of asking which accessory looks best, owners can ask a better question: which location makes this type of gear easier and safer to carry?
Use the Roof Rack for Bulky Overland Cargo
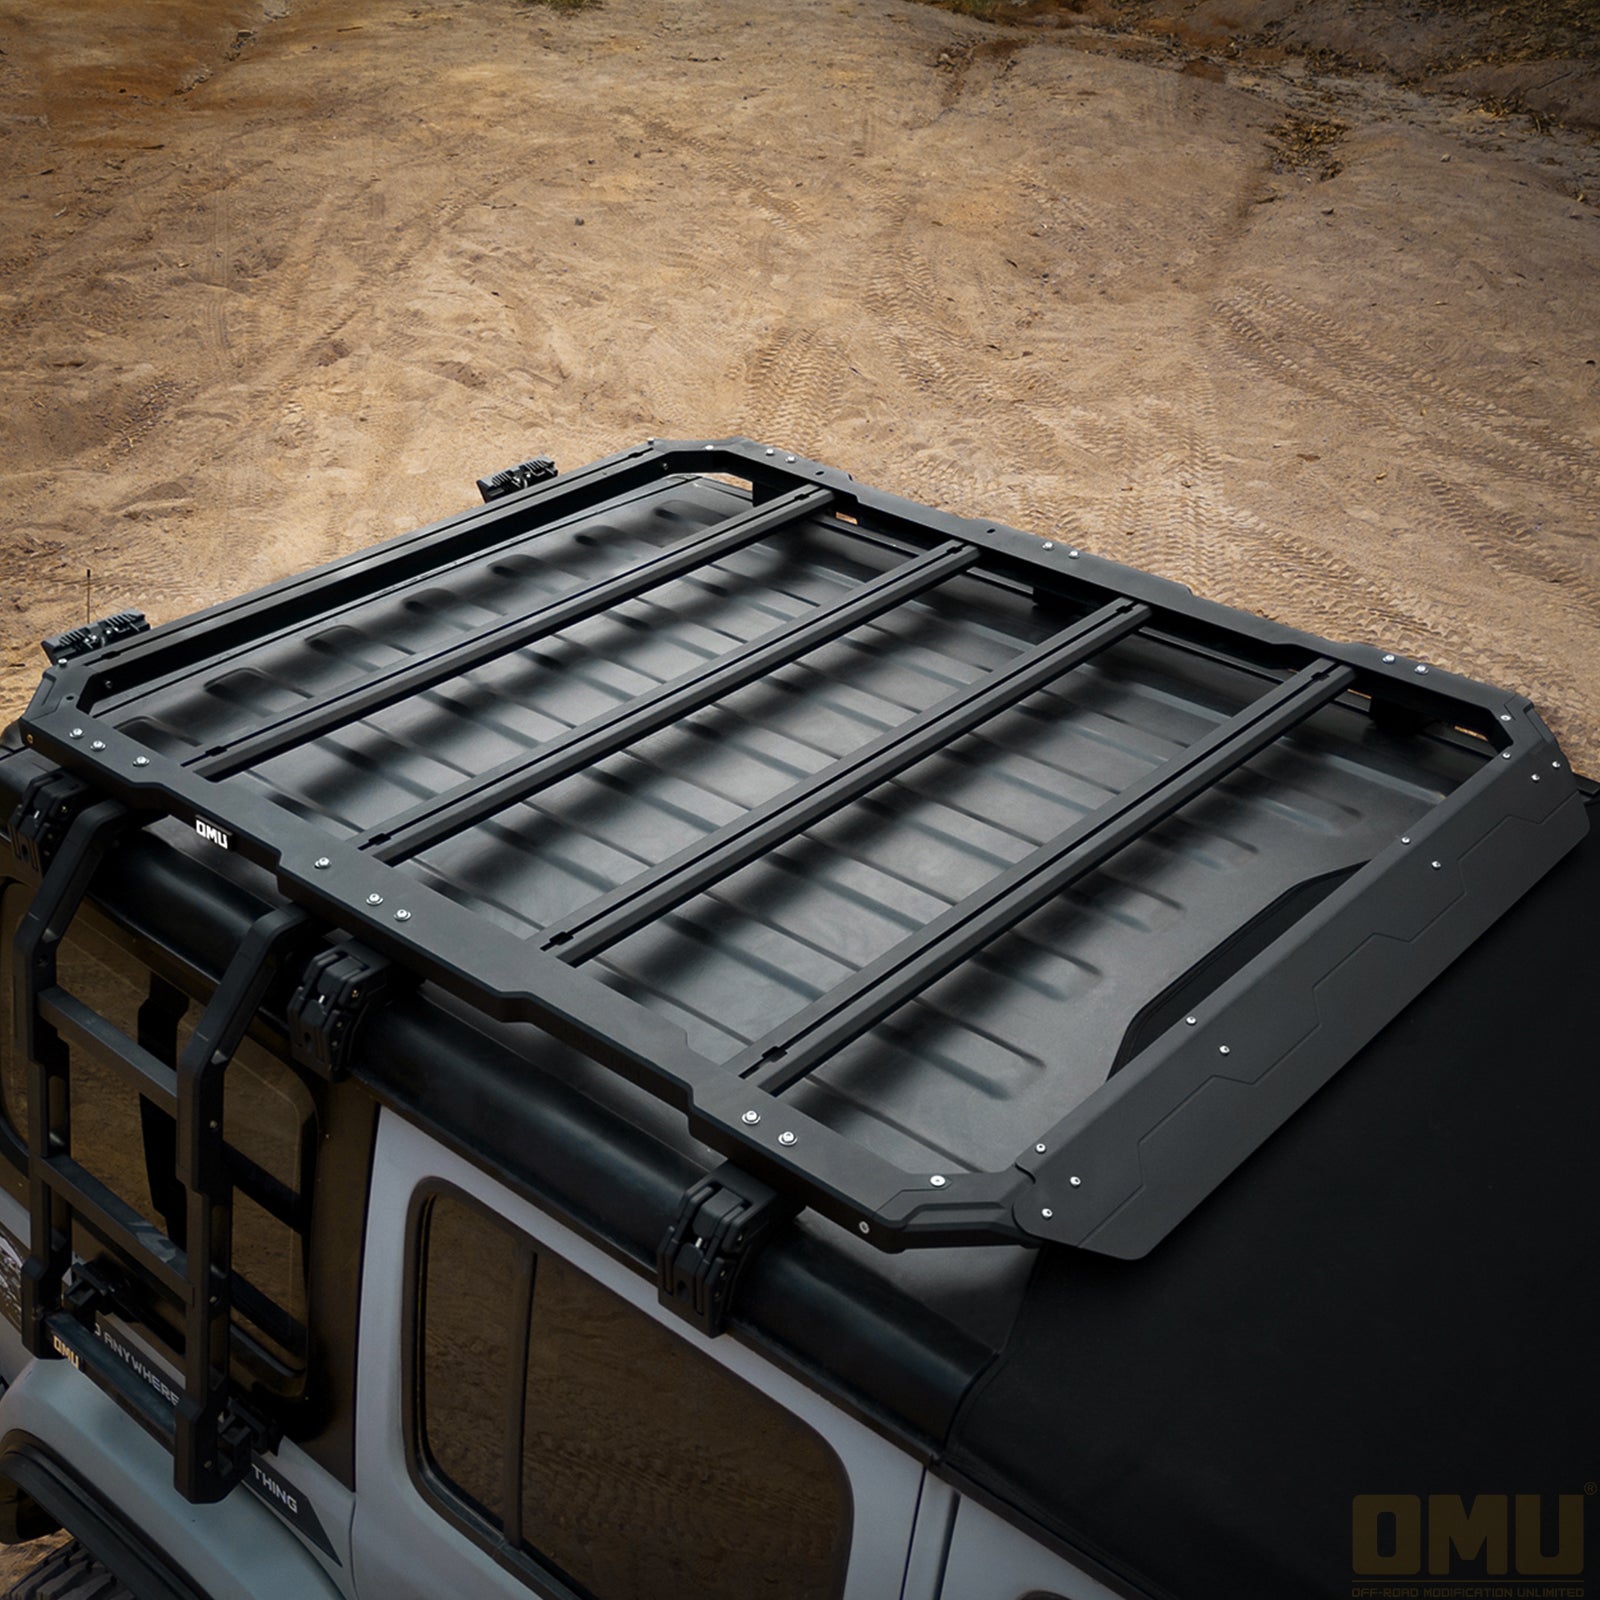
The roof is the best place for large but manageable cargo. Storage boxes, recovery boards, camping equipment, awning bags, and other bulky gear can be placed above the cabin instead of consuming rear cargo space. For overland trips, this makes the interior more comfortable and leaves room for passengers, food, clothing, and protected items.
A roof rack should not become a random pile of equipment. The best layout keeps heavier items lower and more central where possible, while lighter or flatter items can sit toward the outside. Items that are used often should be easier to reach. Items that are only needed at camp can be placed deeper in the roof layout.
FEATURED ROOF STORAGE
Use a Rear Window Storage Panel for Frequently Used Gear
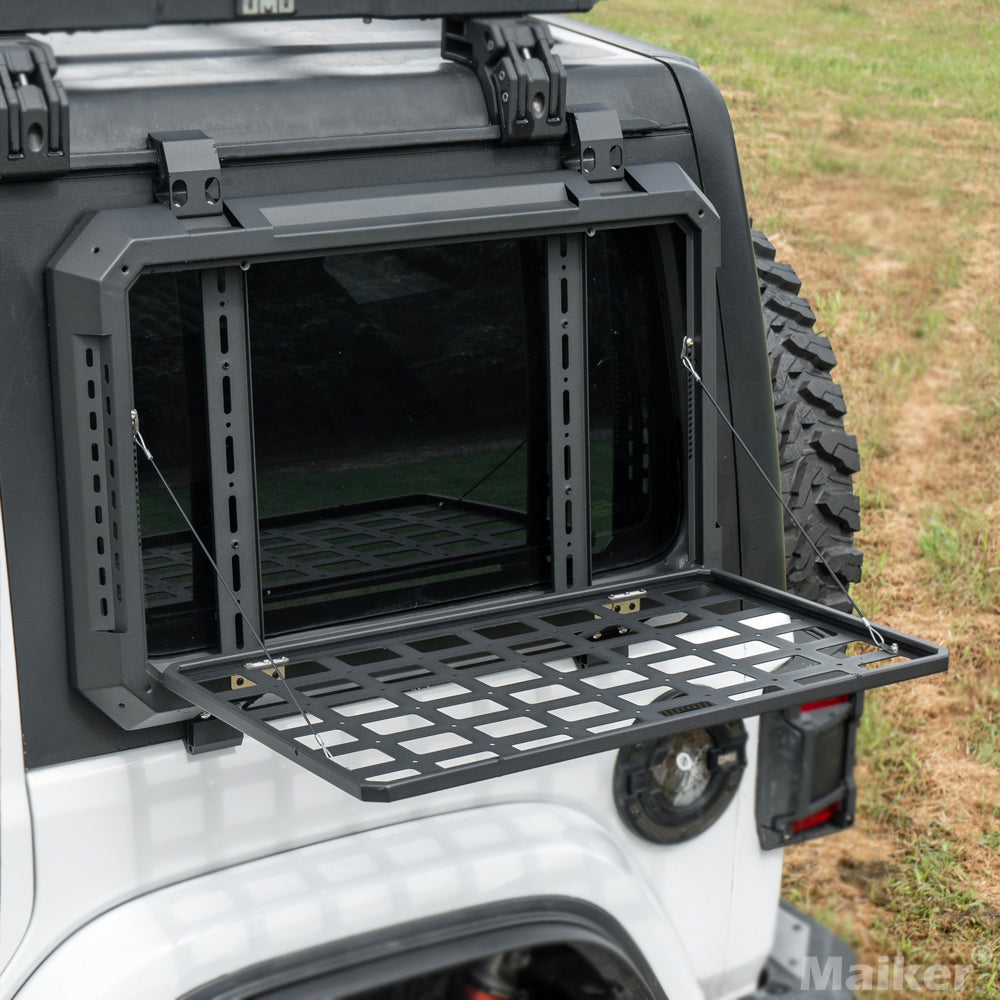
Not every trail item belongs on the roof. Some accessories need to be reached quickly: gloves, recovery shackles, straps, small tools, flashlights, portable bags, tire repair items, and camp setup gear. A rear window storage panel creates a side-access zone for this type of equipment.
This is especially useful on a Jeep Wrangler JL build because the side window area often remains unused. Instead of forcing every tool into drawers or cargo boxes, a storage panel gives the vehicle an external organization surface. It can help separate dirty, sharp, or frequently handled items from the cabin while keeping them visible and easier to manage.
An openable panel also matters because usability is just as important as storage capacity. A panel that can support practical access makes it easier to handle trail gear without unloading the entire vehicle. For camping and recovery situations, this can save time and reduce frustration.
FEATURED SIDE STORAGE
Use a Jerrycan Kit for Fuel and Water Separation
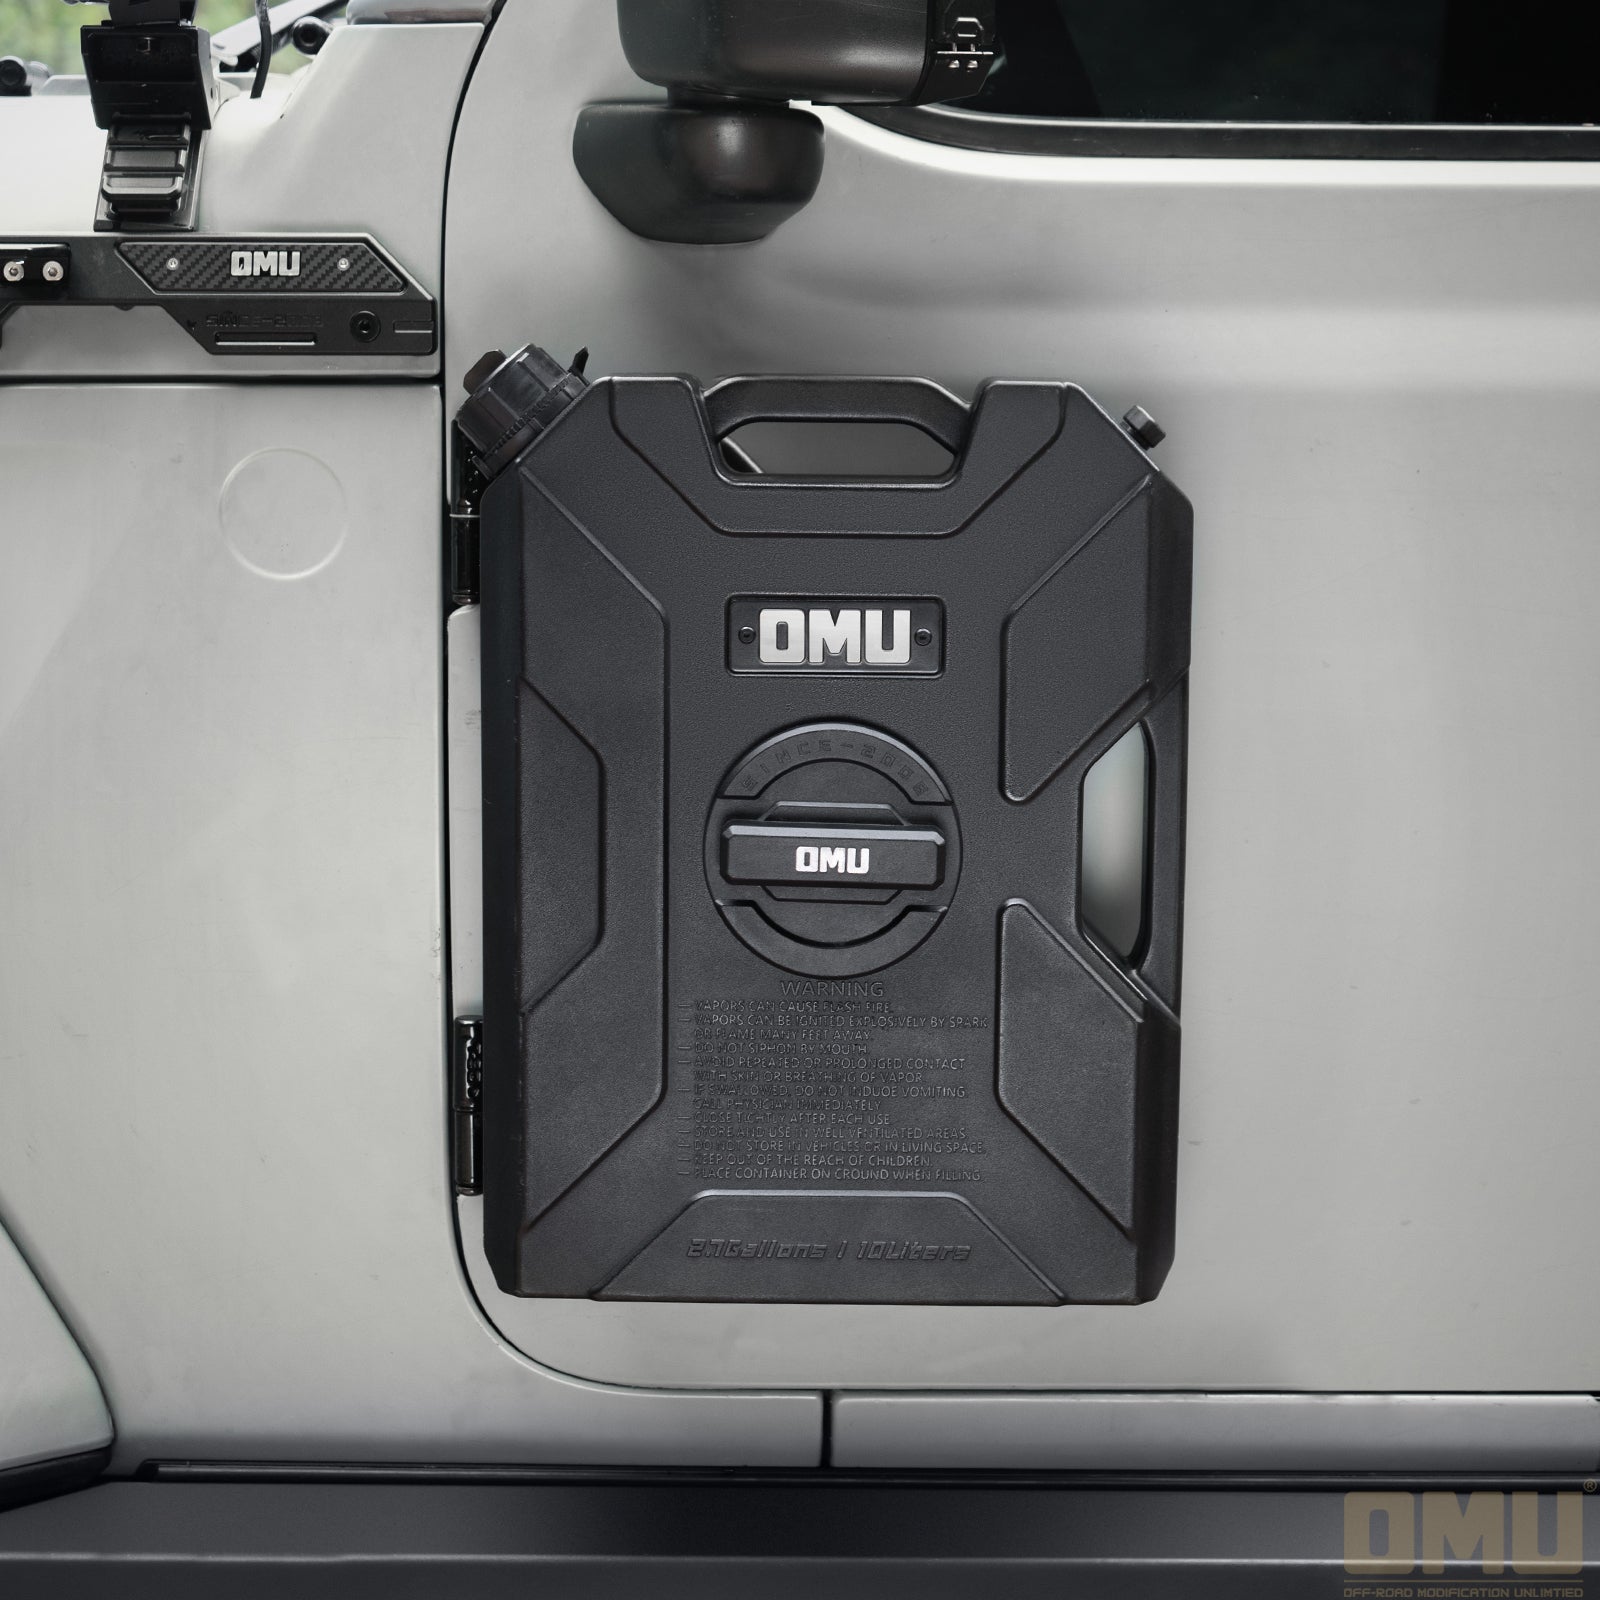
Fuel and water should not be treated like ordinary cargo. They are heavier, need stable mounting, and should be separated from soft interior bags when possible. For longer routes, a Jerrycan kit gives the Jeep a dedicated external storage point for liquid support.
A 10L Jerrycan setup is practical because it adds useful capacity without becoming oversized for daily use. It can support camping trips, remote trail travel, desert routes, or any situation where the driver wants additional fuel or water outside the main cargo area. The point is not only capacity. The real value is separation: fuel and water are kept in a predictable, purpose-built location rather than mixed into the rear cargo space.
FEATURED FUEL & WATER STORAGE
How to Build a Balanced Jeep Exterior Storage Layout
A balanced storage layout should follow the way gear is used. Large items can go high. Frequently used tools should stay accessible. Fuel and water should have dedicated placement. Interior space should remain clean enough for passengers, protected supplies, and daily usability.
One practical layout is simple: roof for bulky cargo, rear window panel for tools and small trail gear, Jerrycan kit for fuel or water, and cabin space for items that need protection. This gives each storage zone a specific job and prevents the Jeep from becoming overloaded in one area.
| Vehicle Zone | Recommended Gear | Reason |
|---|---|---|
| Roof | Storage boxes, camp gear, recovery boards | Expands cargo capacity without filling the cabin |
| Rear side window | Tools, MOLLE bags, quick-access accessories | Improves organization and access |
| Door hinge area | Fuel or water Jerrycan | Keeps liquid storage outside main cargo space |
| Interior | Food, electronics, clothes, valuables | Protects sensitive items from weather and dust |
Avoid Overloading One Side of the Build
Exterior storage should improve the vehicle, not make it harder to drive. Every added accessory changes weight distribution, access, and clearance. A roof rack that is overloaded can raise the vehicle’s center of gravity. A side panel that carries too much weight can become inconvenient. A Jerrycan kit should be mounted securely and checked regularly.
The best approach is to build gradually. Start with the biggest storage problem. If bulky gear fills the cabin, begin with a roof rack. If small trail tools are hard to find, add a rear window storage panel. If fuel or water storage is the problem, use a dedicated Jerrycan kit. This keeps the build practical and prevents unnecessary accessories from being added just for appearance.
Smart Exterior Storage Makes a Jeep Easier to Use
A capable Jeep build is not only about suspension, tires, or lighting. Storage plays a major role in how the vehicle performs on real trips. When gear is organized well, the driver spends less time digging through the cargo area and more time focusing on the route, campsite, and trail conditions.
Roof racks, rear window storage panels, and Jerrycan kits each solve a different problem. Used together, they create a more complete Jeep overland storage system: cargo above, tools on the side, fuel or water outside, and protected items inside. That is what turns exterior accessories into a functional travel setup.
Explore Jeep exterior storage solutions for your next overland build →
Frequently Asked Questions
What is the best way to organize Jeep overland gear?
The best way is to separate gear by use. Bulky cargo can go on a roof rack, frequently used tools can go on a rear window storage panel, fuel or water can use a Jerrycan kit, and protected items should stay inside the cabin.
Is exterior storage useful for daily-driven Jeeps?
Yes, if the accessories are chosen carefully. A clean exterior storage setup can support camping and trail travel while keeping the cabin more usable for daily driving.
What should be stored on a Jeep roof rack?
A roof rack is best for bulky gear such as storage boxes, camping equipment, recovery boards, and items that do not need constant access during the drive.
Why use a rear window storage panel?
A rear window storage panel gives the Jeep a side-access storage zone for tools, MOLLE bags, small recovery items, and camping accessories that are used often.
Where should fuel or water be carried on a Jeep?
Fuel or water should be carried in a secure, dedicated position. A door hinge Jerrycan kit can help keep liquid storage outside the main cargo area and easier to access.
Can roof rack, storage panel, and Jerrycan kit work together?
Yes. These accessories solve different storage problems. The roof rack handles bulky cargo, the rear window panel organizes tools, and the Jerrycan kit supports fuel or water storage.
Jeep overland driving does not end when the sun goes down. In many real trips, the most difficult moments happen after dark: entering a campsite, following a narrow forest road, turning around on a rocky trail, checking a side slope, or recovering another vehicle at night. Factory headlights can handle paved-road visibility, but they are not designed to show every obstacle around an off-road vehicle.
A practical Jeep overland lighting setup should help the driver understand the whole trail environment, not just the road directly ahead. A-pillar lights can cover the side-forward zone. Bumper lights can help with near-front obstacles. Roof lights can extend long-distance visibility in open terrain. The best setup is not the one with the most lights, but the one that places each light where it solves a real problem.
This guide explains how to plan a Jeep overland lighting setup, from A-pillar lights and ditch lights to auxiliary spotlights, beam color, mounting position, wire routing, and trail visibility.
Why Factory Headlights Are Not Enough for Trail Driving
Factory headlights are built for normal roads. They project forward, follow road-use beam patterns, and help the driver see lanes, signs, and traffic. Off-road driving requires a different type of visibility. The vehicle may be turning sharply, climbing uneven terrain, moving beside brush, or approaching an obstacle from an angle.
On a trail, the driver needs to see more than the centerline ahead. The front corners, side ditches, tree branches, rocks, ruts, and campsite edges all matter. When a Jeep turns into a narrow trail entrance, factory headlights may point away from the area the tires are about to enter. This is why auxiliary lights are useful. They add lighting zones that the original headlights do not cover well.
For overland driving, light control is just as important as brightness. A poorly aimed light can reflect off the hood, blind the driver, or create unnecessary glare. A good setup should improve confidence without making the vehicle harder to control at night.
Understanding Different Jeep Auxiliary Lighting Positions
Each auxiliary light position has a different purpose. A roof light is not a replacement for an A-pillar light. A bumper light is not the same as a ditch light. Before buying more lights, it is better to decide what visibility zone the Jeep actually needs.
| Lighting Position | Best Visibility Zone | Best Use Case |
|---|---|---|
| A-pillar lights | Side-forward trail edges | Ditches, turns, forest trails, campsite access |
| Bumper lights | Near-front obstacles | Rock crawling, recovery work, front trail lighting |
| Roof lights | Long-distance forward visibility | Open desert roads, wide trails, long-range viewing |
| Low fog area | Low and wide ground lighting | Dust, rain, fog, and low-speed driving |
Why A-Pillar Lights Are Popular for Jeep Builds
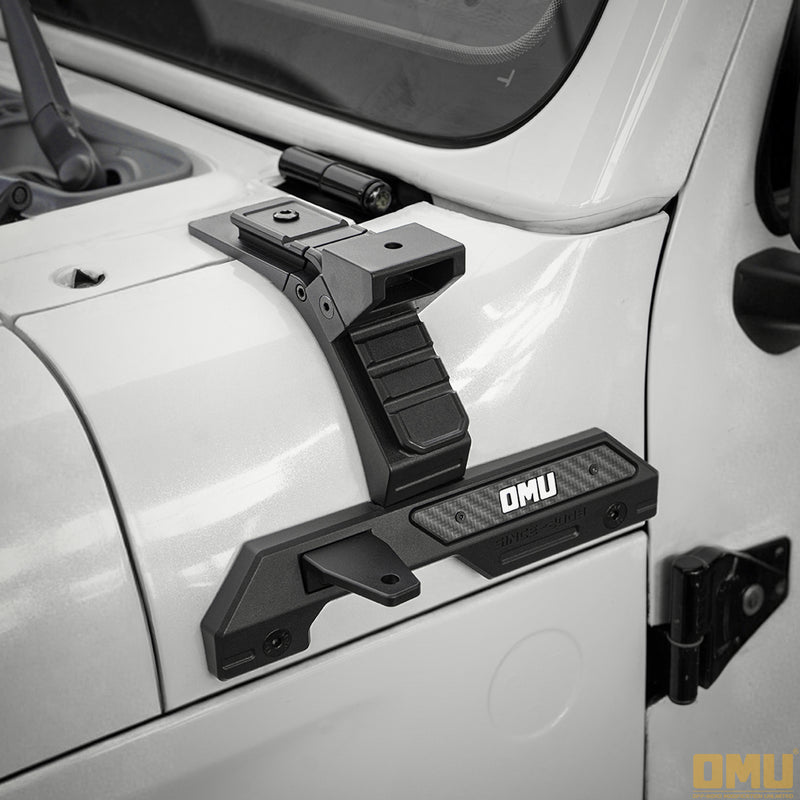
A-pillar lights are popular because they fill one of the most common visibility gaps on a Jeep. When mounted near the windshield pillar and aimed slightly outward, they help illuminate the side-forward area of the trail. This is why they are often called ditch lights.
For overland use, this position is practical because it helps during slow and technical movement. When the driver turns into a trail, approaches a campsite, checks the side of the vehicle, or follows a narrow route, A-pillar lights give extra information near the front corners. They do not need to overpower the headlights. Their value comes from angle and placement.
A stable mount is important. If the bracket vibrates, the light beam can shake and become distracting. A dedicated A-pillar dual light mount gives the lighting system a cleaner position and makes it easier to create a purposeful front-end setup.
FEATURED LIGHT MOUNT
Choosing the Right Auxiliary Spotlight
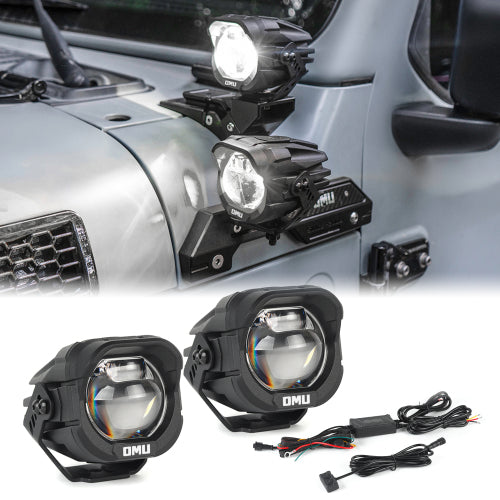
Once the mounting position is clear, the next step is choosing the light. For A-pillar use, a compact spotlight is often easier to manage than an oversized lamp. The area around the windshield, hood, mirror, and door is limited, so the light should fit cleanly without blocking visibility or interfering with body movement.
A 3-inch A-pillar spotlight is a useful size for many Jeep overland builds. It is compact enough for the pillar area while still providing practical auxiliary lighting. It can be paired with a dedicated mount and aimed slightly outward for trail-edge visibility. For a mixed-use Jeep, this creates a cleaner setup than adding large lights in every possible position.
The wire harness also matters. A light is only useful if it is wired cleanly and operates reliably. Proper routing helps keep cables away from heat, sharp edges, and moving parts. It also makes the final build look more intentional.
FEATURED SPOTLIGHT
Choosing Between White and Yellow Off-Road Lights
Beam color should match the terrain and driving conditions. White light gives a clean and bright view of the trail, making it useful for dry roads, rocks, open terrain, and general nighttime driving. Yellow light can be easier to use in dust, rain, fog, and low-contrast conditions because it creates a softer visual effect.
Many Jeep owners choose white for all-purpose visibility and yellow for harsh-weather or desert-style conditions. The right choice depends on where the vehicle is driven most often. However, aiming is still more important than color. A well-aimed yellow or white light will be more useful than a poorly aimed high-output lamp.
| Light Color | Best For | Typical Use |
|---|---|---|
| White | Clear detail and general brightness | Dry trails, rocky terrain, normal night driving |
| Yellow | Reduced harsh reflection and softer contrast | Dust, fog, rain, desert routes, campsite use |
Aiming and Installation Details That Matter
Good lighting performance depends on final adjustment. A-pillar lights should usually be aimed slightly outward, not directly forward. This gives the driver better side-forward visibility and reduces overlap with factory headlights. Bumper lights can be aimed lower and forward for obstacle visibility. Roof lights should be used carefully because they can create hood glare if aimed too low.
After installation, testing should be done at night. Daytime alignment only confirms that the lights look straight. Night testing confirms whether they actually help the driver see. The beam should show the trail edge, not the hood. It should reveal obstacles without reflecting harshly into the windshield.
- Confirm bracket clearance around the hood, windshield, mirror, and wiper area.
- Route wiring away from heat, sharp edges, and moving parts.
- Aim A-pillar lights slightly outward for ditch and trail-edge visibility.
- Test the beam at night before trail use.
- Recheck mounting hardware after rough-road driving.
- Use auxiliary lights responsibly around other vehicles and public roads.
Creating a Complete Jeep Overland Lighting System
A complete Jeep lighting system does not need to be complicated. For many overland builds, a practical setup begins with factory headlights, adds A-pillar lights for side-forward visibility, then uses bumper or roof lighting only when the terrain requires it. This keeps the vehicle functional without creating unnecessary weight, wiring, or visual clutter.
A-pillar lights and compact spotlights are especially useful because they solve a visibility problem that many Jeep owners notice immediately at night. When mounted correctly, they make narrow trails, campsite entrances, side slopes, and low-speed turns easier to read. When paired with a stable dual light mount and clean wire harness, they become one of the most practical lighting upgrades for a Jeep overland build.
Explore Jeep auxiliary lighting options for your overland build →
Frequently Asked Questions
What are Jeep A-pillar lights used for?
Jeep A-pillar lights are used to improve side-forward visibility. They help illuminate trail edges, ditches, turns, campsite entrances, and obstacles near the front corners of the vehicle.
Are ditch lights better than roof lights?
They serve different purposes. Ditch lights are better for side-forward trail visibility, while roof lights are better for long-distance illumination in open terrain.
How many auxiliary lights does a Jeep need?
Most Jeep builds do not need too many lights. A practical setup starts with the most important visibility gap, often A-pillar lights, then adds bumper or roof lights only if the driving conditions require them.
Should Jeep auxiliary lights be white or yellow?
White light is useful for general clarity and dry trails. Yellow light can be useful in dust, fog, rain, and softer terrain conditions. The best choice depends on where the Jeep is driven most often.
Why is a wire harness important for off-road lights?
A wire harness helps create a cleaner and more reliable installation. It supports proper routing, switching, and power connection while reducing loose or exposed wiring.
How should A-pillar lights be aimed?
A-pillar lights are usually most useful when aimed slightly outward. This helps illuminate side-forward terrain, trail edges, and ditch areas instead of duplicating the factory headlight beam.